CentOS ssh设置使用密钥免密码登陆
Jul 18, 2016
1、使用PuTTygen,生成密钥
1.1、点击“Generate”并在窗口内移动鼠标,以生成密钥
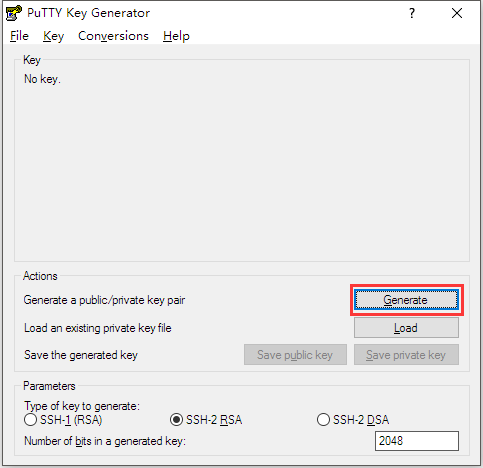
1.2、点击“Save private key”,保存密钥,必要时设置Key passphrase密钥保护密码
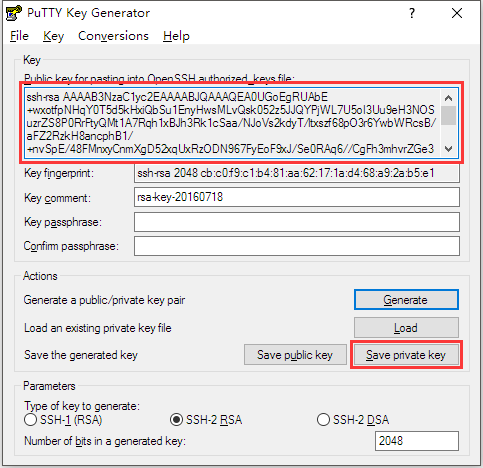
2、将上图PuTTygen对话框内的公钥内容复制到 /root/.ssh/authorized_keys 或者 /用户目录/.ssh/authorized_keys 中(没有则新建)
1 | nano /root/.ssh/authorized_keys |
3、设置 /root/.ssh 文件夹权限700,设置/root/.ssh/authorized_keys权限600
1 | chmod 700 /root/.ssh |
4、编辑 /etc/ssh/sshd_config,去掉前面#(一般可以跳过4、5步骤,CentOS 6.6下测试,不去掉也没有问题,因为这些就是默认值)
1 | PubkeyAuthentication yes |
5、使用命令/etc/init.d/sshd restart( service sshd restart)重启sshd
P.S. 上方配置正确,如果登陆时仍出现 Server refused our key
运行以下命令即可
1 | restorecon -R -v .ssh/ |